Sew Family Jammies


When I was a little girl I spent every Christmas Eve at a candlelight service with my family, then we would come home and open a few presents from my Auntie and Uncle David. I remember one special year very fondly; Auntie had gotten my sister and I each a new set of pajamas with a matching nightgown for our Barbies. Barbie and I went to bed and woke up to find Santa had come with new toys for each of us.

I was excited to learn about #SewFamilyJammies and join in making a set of matching Christmas pajamas for my husband and I. I think this is the first time my pajamas have matched someone else's since that Christmas Barbie and I shared a matching set!

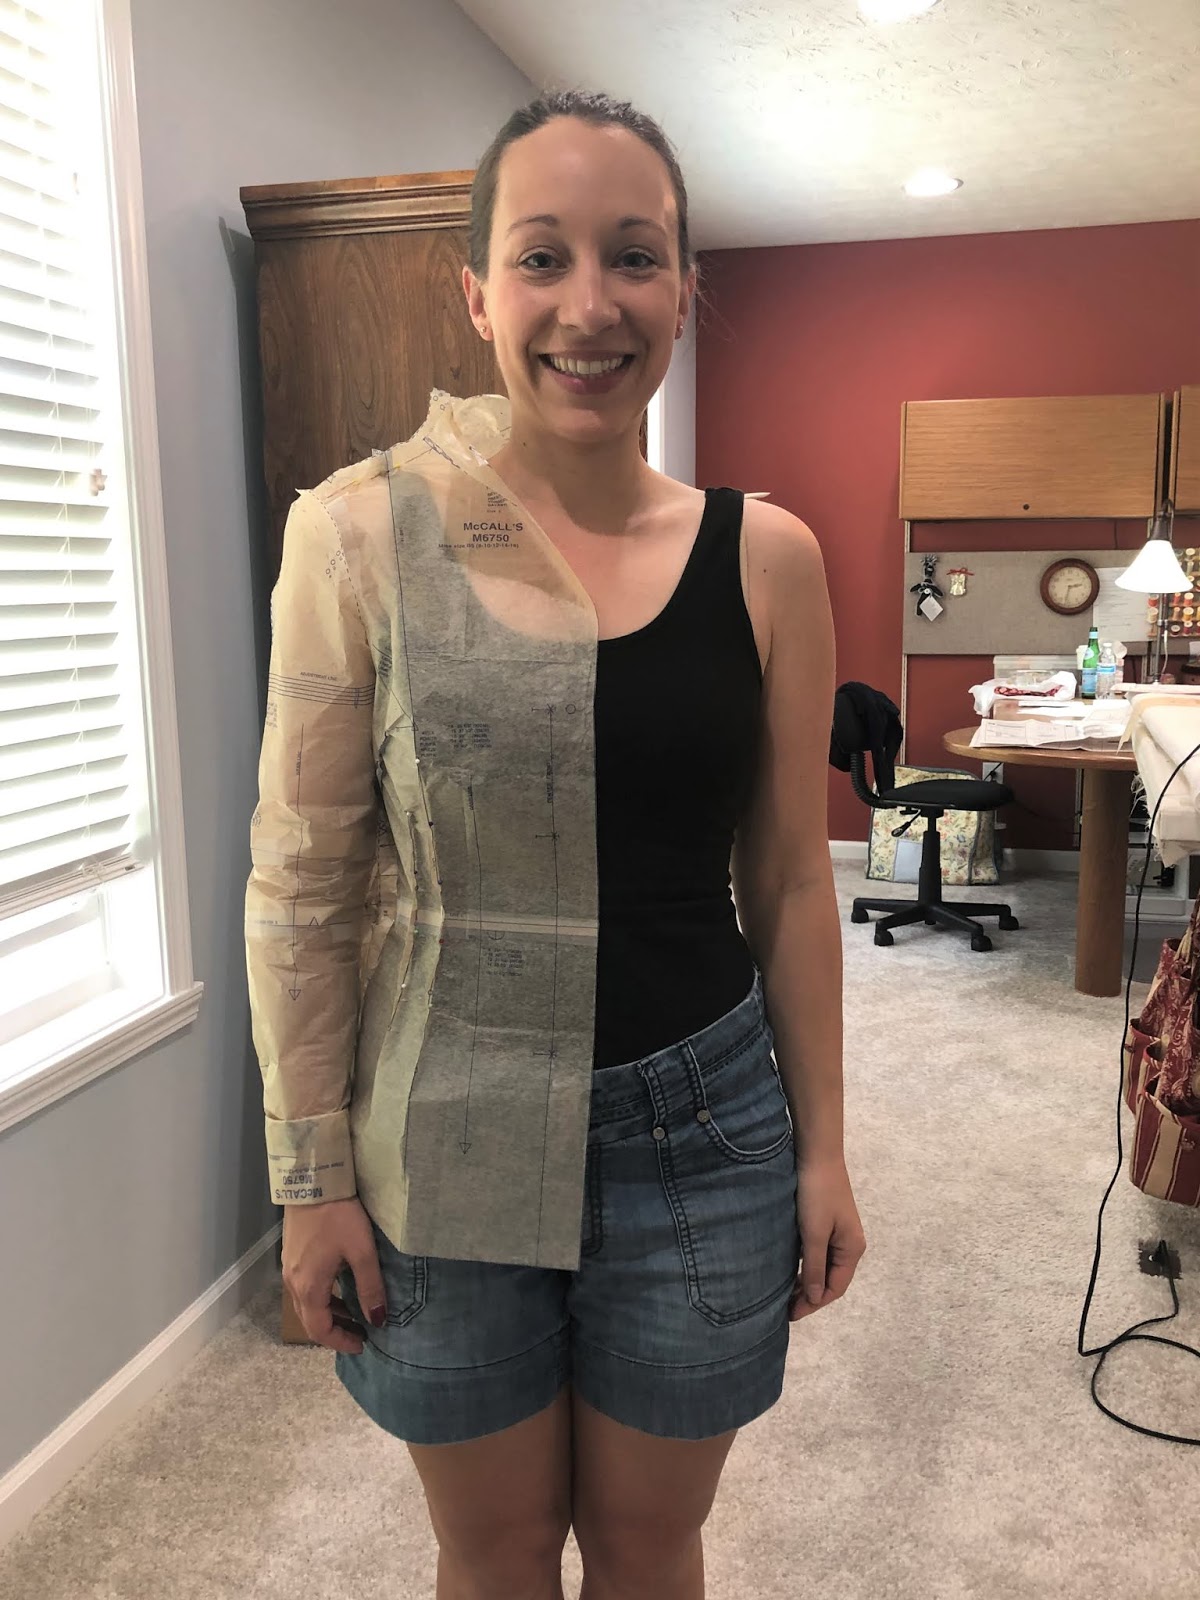
I chose a classic red and black buffalo plaid snuggle flannel for our pajama pants and a black rayon spandex blend for our shirts which I purchased at JoAnn on Black Friday for 70% and 50% off! With such little time between Thanksgiving and Christmas this year I was only able to finish the pajama pants before Christmas, but I do plan to make our shirts soon. I used the same pattern to make a tank top for myself earlier this summer and know I like the fit.


Since I was sewing a plaid I wanted to try to "out smart" the pattern, which had a separate front and back piece, by combining the two pieces at what would be the side seam. In my mind, this would eliminate pattern matching and some work by removing a few seams. However, the pattern was slightly rounded at the hips, so I needed to cut each piece separately. This pattern didn't come with pockets, but since the pattern does have a side seam it would be easy to add them.


I used the sewing pattern markers to make sure the plaid was aligned on the front and back pieces, then I laid one set of front and back pieces on top of the fabric, matching plaids, to cut the next set of front and back pieces. The snuggle flannel is only 42" wide and as it turns out I didn't get enough fabric for two sets of pajamas. I cut a size medium for Paul and a small for myself, after going on an extra fabric run!


I stuck to the pattern instructions, only deviating to hem the pajamas to our height and "stitch in the ditch" to tack the elastic at the side seams. I just HATE when elastic waistbands roll and wanted to prevent that. We love how they turned out.


Merry Christmas from our family to yours!

Time estimate: 4 hours total
Fabric used: 100% cotton
Care instructions: machine wash gentle; no chlorine, bleach or fabric softener; tumble dry low; cool iron

Cost to Make
Pattern: gifted from my mother
Fabric: $16
*thread and elastic from my stash
TOTAL: $16


To follow the rest of the #SewFamilyJammies blog tour, visit these blogs too!
December 2  Teri // Fa Sew La
December 4  Sierra // Seams Like Sierra
December 6  Emily // Replicate then Deviate
December 10  Heidi // Handmade Frenzy                
December 11  Sharon // Sweet Mama Life
December 12  Carrie // Beri Bee Designs
December 13  Katie // KatieKortman.com
December 16  Melissa // A HAPPY STITCH
December 17  Taish // Blooming Skies
December 18  Leanne // Thready For It
December 20  Brooke // Idle Sunshine
December 21  Marissa // Sew Help Me
December 23  Lara // Handmade by Lara Liz
December 24  Kelly // Petite Stitchery
December 25  Jess // Broad In The Seams
December 26  Victoria // Victoria Beppler
December 27  Heather // Heather Handmade
December 28  Sylvia // The Ravel Out
December 30  Victoria // Victoria Lucille Anne
December 31  Teronia //  Sew Haute Blog
QuickEdit
Marissa
2 Comments

Lady McElroy Cotton Poplin Shirt Dress - Minerva Makers


I simply love this dress, from the perfect color palette to the tailored fit it is sure to be a staple in my wardrobe. I took my time tissue fitting this dress and love the results. It reminds me to slow down and enjoy the process because I will love my finished garments so much more. What a hard lesson that has been to learn!

You can read about my fitting process and see more pictures of the finished garment on my recent Minerva blog post and purchase the same fabric while you're there!

This fabric was gifted to me in return for a blog post and this post contains affiliate links. I would absolutely purchase and make this dress again! Thank you for your support.
QuickEdit
Marissa
0 Comments

Palmer Pletsch Tissue Fitting - M6750


I recently had the opportunity to take a tissue fitting class with a local Palmer Pletsch certified instructor. I have been familiar with the tissue fitting method for some time, but wasn't familiar with the adjustments I needed to make in order to get a well fitted garment. With the help of my teacher I was able to make the best fitting button up I've ever worn!

I used the McCall's 6750 Palmer Pletsch button up shirt pattern for this class. The unique thing about using Palmer Pletsch patterns is they include fit lines on the tissue. These fit lines were an incredibly helpful tool as I learned how to make the adjustments I needed.

We started with taking new measurements for me, referencing the size and finished measurements on the pattern envelope, and rough cutting the pattern. Using a red colored pencil I marked seam allowances and pinned out the seam allowance and darts, then tried on the tissue. This first visualization helped me to identify a few fit issues including the need to bring the pattern waist line up to my natural waist and lengthen the bottom of the pattern to keep the original length. I also needed to do a sway back adjustment, bringing the tissue closer to my lower back.


Once these adjustments were made and taped out of my tissue I then needed to fix the darts, making sure they remained parallel to the grainline as indicated on the pattern piece. After making these initial adjustments it was time to cut out my fabric, pin out the seams and darts, and try it on again. The second fitting helped me see a few additional adjustments I needed to make, including a square shoulder adjustment to alleviate some fabric tension across the back of my neck. I also needed to shorten the sleeves, my right side slightly more than my left.


I ended up needing to cut a new back piece and re-pin for a final fitting. It was amazing how much better the final fitting was from the first, and I thought the first fitting was okay. I'm glad to learn how much better it can be! And the goal of sewing my own garments is to get a good fit.


I'm so thankful I took this class and learned how to get a better fit in my handmade garments. I'm looking forward to taking what I've learned and applying it to my future makes. And the silver lining, sewing with a local sewing friend!

I would highly recommend my certified Palmer Pletsch sewing instructor, Evelyn Cummings, if you're in the Indianapolis area. To find a certified sewing instructor in your area visit the Palmer Pletsch website.


Time estimate: 6 hours
Size: 8
Fabric used: cotton blend
Care instructions: machine wash cold, tumble dry low

Cost to make:
Pattern - $5
Fabric - gifted
*buttons, thread, and interfacing from my stash
TOTAL: $5
QuickEdit
Marissa
2 Comments

Lurex Sweatshirt Tulip Tee - Minerva Make


My husband says my favorite color is sparkle, and he's not wrong. I recently made the Patterns for Pirates tulip tee out of Minerva's lurex sweatshirt fleece and it has a gold thread throughout. It is certainly a cute and snuggly must buy fabric. That said, I would size up if making this t-shirt pattern into a sweater again. You can read all about my process and see more pictures of my final make on Minerva's website here.

This fabric was gifted to me by Minerva Crafts. You can purchase it through my affiliate links here.

This fabric was gifted to me in return for a blog post and this post contains affiliate links. I love how this fabric washes and wears; thanks for your support!

QuickEdit
Marissa
0 Comments

Ogden Ida Swap 2019


I've had my eyes on the ogden cami pattern for well over a year now and added it to my 2019 Make Nine list hoping to inspire myself to finally get around to making it. Well, I haven't made many of my 2019 Make Nine sewing projects, but found this summer's Ogden Ida Swap to be just the inspiration I needed (with a deadline and a partner depending on me) to make the ogden cami!


I found this gorgeous rayon fabric on sale at JoAnn early in July. I knew this fabric would be a perfect match for the ogden cami as soon as I saw it and the colors would compliment most things in my wardrobe. I had to have it!

I purchased two yards of the fabric in order to make an ogden cami for myself as well as my swap partner. I used a simple black cotton blend from my stash for the lining to conserve as much of the fashion fabric as possible.


This pattern was very straightforward and satisfying to make. I sewed our ogden camis using French seams, which added a bit more time but was well worth it. French seams create a very professional looking finish and one I was happy to share with another sewist.


My husband and I recently traveled to South Korea and I was able to pack both the ogden cami I made for myself as well as the one I received in the swap. I was glad to have such easy and lightweight blouses with me; Korea was HOT!


Amy, of Amy Nicole Studio, made the floral ogden cami picture above for me and I couldn't be more happy to have received it. First, you know I love all things floral. Second, all those colors make this cami "go" with everything. Thank you for making such a beautiful garment for me Amy.

Amy's version is fully lined and used a rolled hem. I think I'll take a few hints from her when I make my next ogden cami. And rest assured, there will be more!

Time estimate: 6 hours (to batch sew 2 ogden camis)
Size: 4
Fabric used: 2 yards, 100% rayon purchased from JoAnn and 1/2 yard cotton blend from my stash
Care instructions: machine wash cold, gentle cycle; line dry

Cost to make two ogden camis:
pattern: $8.50 (plus marginal printing costs)
rayon fabric: $12
*used thread from my stash
TOTAL: $20.50, or $10.25/cami plus shipping costs for one cami
QuickEdit
Marissa
0 Comments

Joey Tank - Pattern Test


I recently had the privilege of testing the Joey tank by Made Again Patterns. I love the mission of this company; Jessica designs her patterns with refashioning in mind. I have been recycling fabric since I was a 4-Her and love that Made Again gives a bit of structure to beginning refashioners.


All of the fabric and the thread that I used for this project were sourced from ReCraft Indy, a secondhand store for craft and hobby supplies with a focus on sustainability and environmentalism. And the button was an extra from a RTW sweater that was long since moved on from my closet.


I made my own bias tape for this pattern, sewing together pieces of what I think were once quilting scrapes. It was fun and didn't effect the appearance of the final product in any significant way since I positioned the joining seams at the same location on each arm.

I also appreciate that measuring the length needed for shoulder straps was included in the pattern instructions. Nothing is worse than constantly having to yank your straps back up all day!


This pattern is geared toward an "advanced beginner" and it was a fun weekend sew I would recommend to anyone looking for an easy, breezy summer tank. Just imagine all the refashioning possibilities!


Time estimate: 4 hours
Size: Small
Fabric used: cotton, unsure of specific!
Care instructions: cold water wash, line dry (just to be safe)
Cost: $3 estimated
QuickEdit
Marissa
0 Comments

Floral Tank Top


I recently went home for the weekend where I spent hours with my mom looking through her collection of sewing patterns. She let me borrow more than a dozen and my sewing queue is full. Be on the look out for a few vintages pieces in the near future!


This pattern is one that I discovered in her collection, Simplicity A2116. It's a pajama pattern, but I love how classic the shape of this tank top is and knew it would be a quick sew. And Mom had a bundle of So Sew English fabric she was willing to share! You know how I'm a sucker for a good floral.


The pattern instructions called for turning under and top stitching all raw edges, but Mom and I wanted to add a neckband and armbands for a more classic look. To create these pattern pieces we measured the arm holes by standing a measuring tape on its edge and reduced the length to 87.5% of the opening length and adding 1/2" for the seam allowance. I sewed these in first and liked the finished product, but it was a tight fit, so I tried 90% of the opening length plus 1/2" seam allowance for the neckband. Although it was easier to add the neckband than the armbands, I would like the neckband to fit a bit more snugly and would reduce it to 87.5% if making this tank top again. The neckband and each armband was cut at 2" in depth.


I was able to try a new, more decorative stretch stitch on the hem of the tank top and serged all interior seams with nylon stretch thread on both loopers. This tank top is sewn to be lived in, and I'm sure it will get a lot of wear this summer.


Time estimate: 3 hours
Size: 10
Fabric used: knit blend from So Sew English scrap bundle, unsure about specifics!
Care instructions: cold water wash, line dry (just to be safe)
Cost: free to me!
QuickEdit
Marissa
0 Comments

Mimi G High-Waisted Skinny Pants


I recently made Mimi G's high-waisted skinny pants, Simplicity 8655, using stretch gabardine suiting from Minerva Crafts and LOVE how they turned out! Thankfully I was able to sew along with Mimi herself through her amazing sew along video on Youtube. You can read all about my experience making these pants on Minerva's blog here!

Now I've made both the tie-front top and pants from the same pattern, both using Minerva fabrics. You can see my tie-front wrap top blog post here. I love both of these pieces, together or separately!


This fabric was gifted to me by Minerva Crafts. You can purchase the John Kaldor Paris silky satin fabric and stretch gabardine suiting through my affiliate links here.

Pictures by Sara at saraballenger.
QuickEdit
Marissa
0 Comments

Fern Top - Pattern Test


I was recently offered the opportunity to test a second pattern, the fern top, for Pattern Scout Studio. This pattern was truly a joy to sew. It was quick to cut and sew and is easy to pull on and wear, a fun sew for any skill level. 

One of the greatest parts about this pattern is that it comes with multiple cup sizes, allowing it to both fit well and simply pull on over your head. I made view b, with a straight skirt, and made no adjustments. In the future I will probably make other versions with a bias binding neck band and will also add at least an inch to the length of the skirt. I'm 5' so you may want to think about adding a bit of length too! I think this would also be a great top to try French seams on.


Thanks for having me test the fern top Casey!

Time estimate: 3-5 hours
Size: 6
Fabric used: poly blend from my stash, 1 1/4 yards
Care instructions: cold water wash, tumble dry low

Cost to make fern top:
pattern - $14.00 value
fabric - from my stash
thread - from my stash
TOTAL: $14.00+ value

This pattern was gifted to me in return for testing it for its release.
QuickEdit
Marissa
0 Comments

Me-Made-May 2019


This year was the first time I participated in Me-Made-May and it was a wonderful experience. I'm so thankful to Zoe from SoZoWhatDoYouKnow for coordinating this pledge. My pledge was, "I, Marissa, sign up as a participant of Me-Made-May 2019. I endeavor to wear each me-made item in my closet, finish my UFOs, and learn about what I like to sew and actually wear to inform my future makes. This is my first time participating in Me-Made-May and I hope to document my journey!


I did wear each me-made in my closet and even ended up pulling a few of my more wearable toiles to add to the rotation. I had fun mixing and matching these pieces, especially different prints with accessories, although participating in Me-Made-May in future years, when I have even more options to choose from, will be even more fun!


I was unsuccessful at finishing any unfinished projects. Most of my unfinished projects are darker, heavier knits that will get most of their wear in the fall and I'm not feeling all that inspired to complete them at the moment, although I will the autumn, I swear!

I did start and complete a few mending projects I have been meaning to get to, making for a few more wearable items in my closet. Although I have a few additional mending projects to get to, this was a great place to start.


I learned that I prefer to wear earth-toned textiles and that have largely sewn business casual and formal wear up to this point. Most me-made garments in my closet are tops and I have very few warm-weather appropriate pieces. I also learned that if I make a toile I have rarely made the originally intended garment in my fashion fabric, even if I already purchased the fabric for it! I hope to spend the last half of the year working on these pieces as well.


During May I paid a lot of attention to the Refashion Revolution week and even watched The True Cost. I want to be more intentional about what I'm sewing in the future, not just getting swept up in the social aspects of a variety of Instagram challenges however fun those may be. I think I will focus on elevating my craft in the future, making fewer and more high-end pieces. I've already started by being more intentional about connecting with other local seamstresses and planning my future projects with the free Seamwork collection planner.


As you can see I did a fairly good job of documenting what I wore this month through pictures. I enjoyed the process, although I did spend a bit more time getting ready in the morning! There were only five days in the month that I didn't wear at least one me-made garment, one for a sick day and four for camping. I will probably also think about sewing some athletic and athleisure pieces in a future as well.

Did you participate in Me-Made-May this year or a previous year? Would you like to do it in the future? I think I will do it again!
QuickEdit
Marissa
0 Comments

Mimi G Tie-Front Top


Today I'm featured on the Minerva Craft blog in my new Mimi G tie-front kimono style wrap. This has been the perfect topper for a changing season and was a very quick make. Mimi G even walks you through all the step in a video guide on YouTube. If you have this pattern, it's time to make it!

This fabric was gifted to me by Minerva Crafts, but the opinions are all my own. You can purchase this fabric through my affiliate link here.
QuickEdit
Marissa
0 Comments

Vogue 1499 - Easter Dress Inspired by Catherine, Duchess of Cambridge


I have been so inspired by both of the duchesses style. I want to act like them and dress like them! So I’ve been working on a few special sewing projects to replicate garments I’ve seen Kate and Meghan wear.

For Easter I made Vogue 1499, similar in style to a dress Kate wore in Germany in 2017. My version had the same general style lines as Kate's dress, with Dior darts, a pleated skirt, and yellow lace overlay. The shade of yellow lace I used for my dress is much less saturated than Kate's dress, my skirt has more pleats and cap sleeves, and my lace fabric has a scalloped lace edge.

This Vogue pattern is made for crepe, linen, and silk dupioni fabrics. I used a white faille fabric with a nylon lace overlay from JoAnn. I cut each pattern piece in the faille as well as the lace and basted them together inside the 5/8" seam allowance, essentially creating one piece of fabric. This method worked well in most places, although I did cut four sleeves in the faille fabric and follow the pattern instructions for sleeve assembly, adding the lace overlay after the sleeves were assembled. I also needed to leave a few inches unstitched at each skirt side and back seam to allow me to hem the white fabric before stitching the rest of the side and back seams together.


Although I love how this turned out, getting the fit right was frustrating. According to the pattern instructions I should have been a size 12. I know that I am usually an 8-10 in traditional tissue patterns, but couldn't find any finished measurements for the bodice and therefore decided to be safe and cut the larger version. I tried to tissue fit the bodice pattern pieces to myself, but usually find this fitting technique works best with a second person assisting. Wow did I regret cutting the size 12 later! I ended up taking 1" off the bottom of the bodice to shorten the torso and removed 1 3/8" from each side at the center back. I ended up making so many fit adjustments that I was entirely overwhelmed at the thought of recreating my adjustments for the lining and ended up putting the whole project off until the last minute. In the end I did not line the dress, opting instead to use single fold bias tape to finish the neck and underarms. This was the first time I used bias tape in place of a facing or lining but I am thrilled with how it turned out and plan to use that technique again in the near future.


Overall I am thrilled with my version of Kate's yellow lace dress. I usually try to avoid wearing yellow, which doesn't look great on my skin tone; however this lighter yellow has me convinced to try yellow again. I wish the bodice of the dress was a bit more fitted and would likely make a size 8 if I were to make this pattern again.

Have Meghan and Kate's style inspired you?

Time estimate: 12-14 hours
Size: 12
Fabric used: white casa dahlia high shine faille fabric, 2 yards and sunshine casa collection lace fabric, 2 yards
Care instructions: machine wash cold, line dry

Cost to make:
pattern: $6
faille fabric: $14
lace fabric: $16
invisible zipper: $3
thread: $2
*used bias tape, and hook from my stash
TOTAL: $41

Resources
Professor Pincushion's tutorial for bias tape finish
KateMiddletonStyle.org for pictures of Kate
QuickEdit
Marissa
0 Comments

Charleston Vest


I recently had the honor of guest blogging for Toby K Patterns. I made the Charleston vest for my husband's Easter outfit. Click here to read the blog, and get a limited time discount on your own Charleston vest pattern!

This pattern was gifted to me in return for a blog post. He (and I) do truly love his new dress!
QuickEdit
Marissa
0 Comments

Metallic Peachskin Pussy Bow Blouse (Minerva Craft Blog)


I'm back on the Minerva Crafts blog today with my first, but certainly not last, Sew Over It London pussy bow blouse. I've been wearing my new top to work like a uniform, it's great for layering, and the fabric has a METALLIC flake! Check out my post on their blog here.

This metallic peachskin crepe fabric was gifted to me by Minerva Crafts, and I truly love it! You can purchase some yourself through my affiliate link here.

This fabric was gifted to me in return for a blog post and this post contains affiliate links. I do truly love my new top and thank you for your support!
QuickEdit
Marissa
0 Comments

Secret Pajama Club - Moneta Dress (Minerva Craft Blog)


I recently joined the secret pajama club with this Moneta Dress made with Deluxe Viscose Jersey Knit Fabric from Minerva Crafts. Check out my blog post on their page here.

This fabric was gifted to me by Minerva and I truly love the quality of it. You can purchase the same fabric through my affiliate link here.

This fabric was gifted to me in return for a blog post and this post contains affiliate links. I can't describe how soft and luscious this fabric is; thank you for your support!
QuickEdit
Marissa
0 Comments
[name=Marissa] [img=//4.bp.blogspot.com/-PZLYzJMG34Y/XiU1zvVCSSI/AAAAAAAARmg/Fom6rY8JYb4c5J4_WgJ0cOTlrVOsq1nFgCK4BGAYYCw/s355/NielsenFamily19Final-11%2B%25282%2529.jpg] [description=Hi, I'm Marissa, a hobby seamstress. Thanks for joining me on my journey as I create a handmade wardrobe. Like and follow via the social media links below to see my newest makes!] [(instagram=https://www.instagram.com/sew_help_me)] [(facebook=https://www.facebook.com/SewHelpMebyMarissa)] [(bloglovin=https://www.bloglovin.com/blogs/sew-help-me-19274771)]