Floral Avery Leggings


I can't count the number of RTW leggings I've been through trying to find the perfect pair. They're usually too shear and almost always walk down my legs. It was time to try making a pair of leggings so I was thrilled when Helen's Closet had a sale on the Avery Leggings PDF Pattern last month and I bought the .pdf pattern right away. Plus how cute is this floral knit print from JoAnn?! I just had to have it after I saw it.


I made View A with a low rise waist, ankle length in a size small and still hemmed the length a bit extra. This pattern was quick and easy to assemble and the leggings were a breeze to whip up. However, when I make them again next time I will size up. This pair turned out a bit too tight throughout my thighs and waist and I ended up not even needing the elastic in the waistband. I have always envied my girlfriends' vibrant printed leggings and finally have a super soft pair for myself. And they're so comfy to travel in. I can't wait to make another pair!


Time estimate: 2-4 hours
Size: small
Material used: knit print, 97% rayon and 3% spandex
Care instructions: machine wash cold, gentle cycle, line dry, cool iron as needed

Cost to make leggings:
pattern - $12.00
fabric - $15.75
*thread from my stash
TOTAL: $27.75 plus tax
QuickEdit
Marissa
0 Comments

The Pippa Dress


Mid-last week I was offered tickets to a red carpet viewing of the Oscars. It was late notice, but I was so excited for a formal occasion that I went straight to JoAnn Fabrics after work and bought 
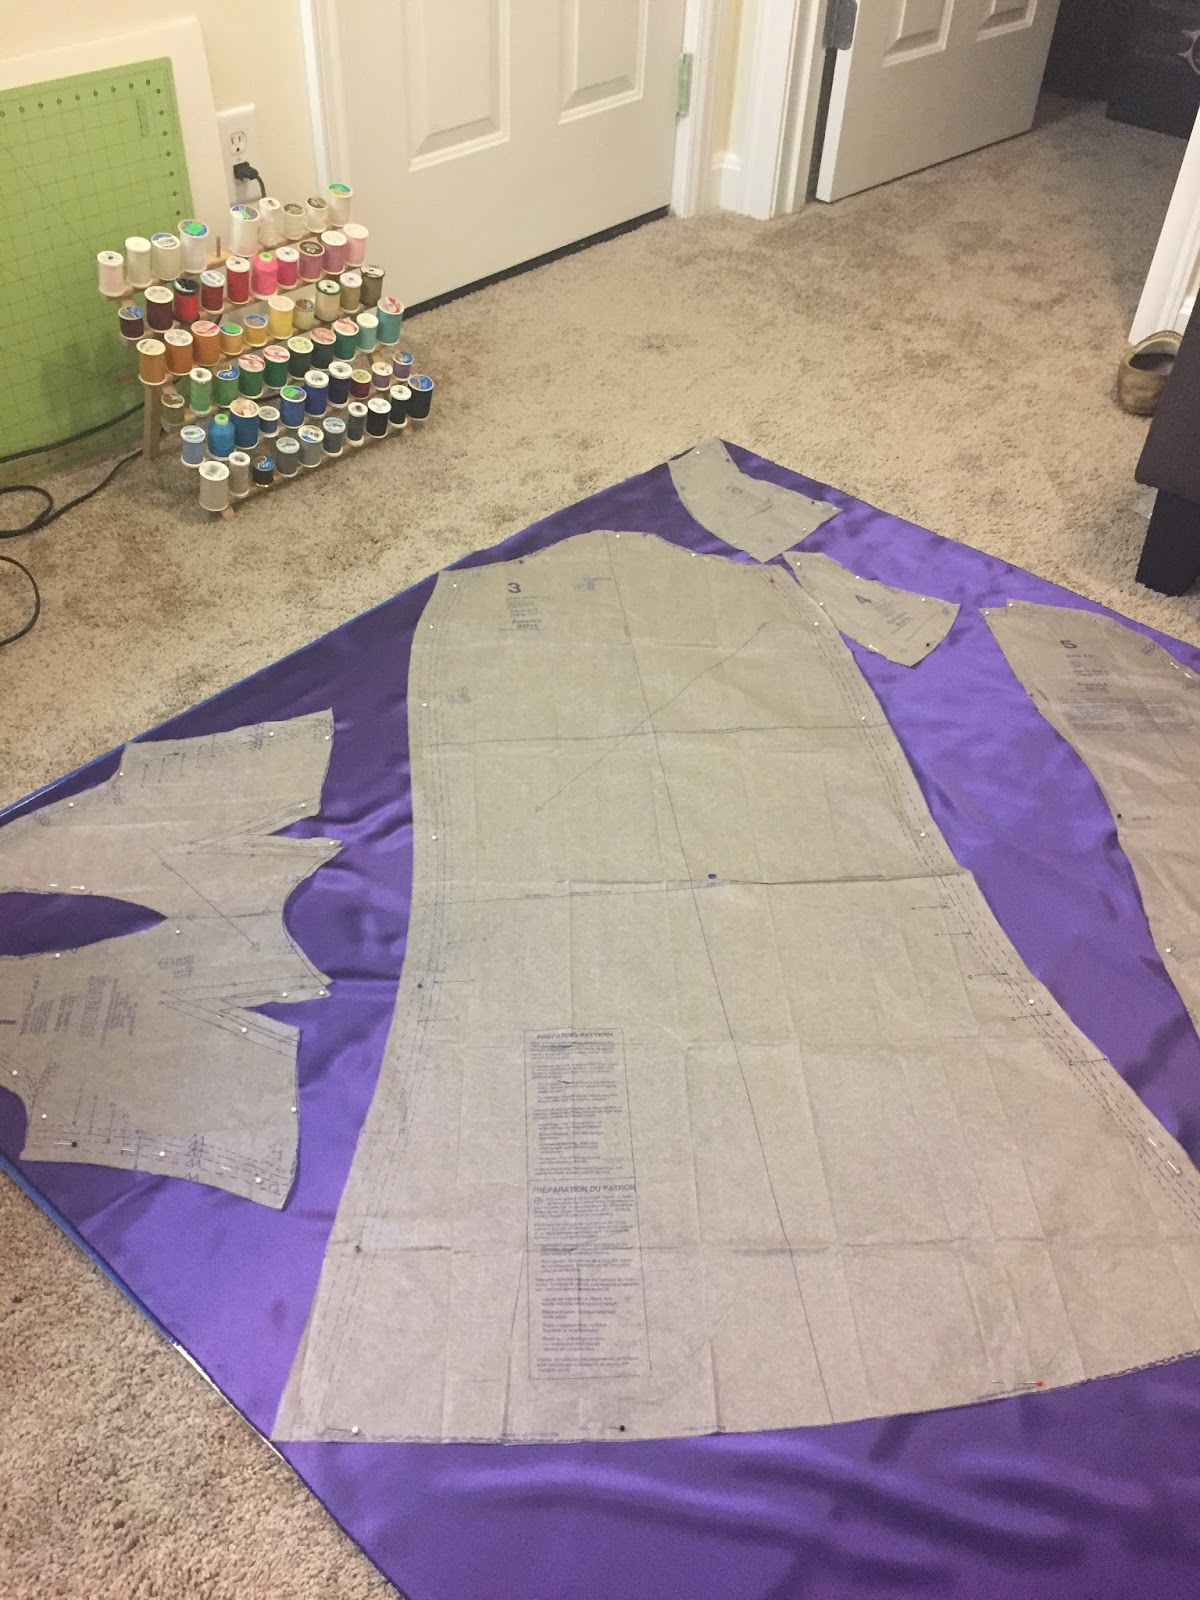
a pattern, material, thread, and a zipper. I finally had the opportunity to make The Pippa Dress!


This was my first dress cut on the bias and my first time making raglan sleeves, which means it had the potential to be very time consuming. Again, I did not have much time, so I decided not to line the dress, only purchasing enough material for the outer dress. Or so I thought...


When I got home I cut out the pattern, laid it on the material, and quickly realized that I was a yard or two short. In my haste to start this project I misread the pattern envelope! I decided to cut out the pieces I could and make as much progress as possible before heading back to JoAnn's the next day.


The cowl neckline came together quickly and easily and looked amazing. After not having enough material this was the little pick-me-up I needed to keep working. The next step was attaching the skirt front to the bodice, which took a bit of effort to get the easing correct.


It took me a while to figure out how to finish the neckline since I wasn't going to line the dress. In the end I made my own facings with extra material and was happy with how well it worked. I also had to decide how to finished the sleeves since they weren't lined either and decided on a simple topstitch for speed and efficiency.


I wanted to make the dress floor length, but thought it would be best not to add the train given the type of event I was going to. The pattern piece for the train was a separate piece so in theory this would be easy enough to complete. After holding the sold back paper pattern piece up to my back I decided to add an inch to the length just to be safe. However, even with the extra inch, the back of the dress wasn't long enough to finish at floor length, so I ended up cutting out the train separately and attaching it after the fact. This wasn't ideal, especially because after purchasing additional fabric I would have had enough to cut out sold back pieces, but I was happy with the finished product.


There are a number of little things I would have done differently if I were to make this dress again, starting with giving myself enough time to finish it, but I am happy with the end result and hope to have the opportunity to wear it again.

Time estimate: 16-20 hours
Size: 12
Material used: crepe back satin, 100% polyester
Care instructions: machine wash cold, line dry, warm iron when needed

Cost to make dress:
pattern - $2
material - $30
zipper - $2
thread - $2
*hook and eye from my stash
TOTAL: $36 plus tax
QuickEdit
Marissa
2 Comments

Summer Cardigan


I am so excited to share my Blackwood cardigan from Helen's Closet with you. It was my first home run of the sewing season and will be perfect for the spring weather headed our way. I can't wait to make another version or two!

I purchased white, double sided brushed dty jersey from Mood to make this cardigan and love how soft it is. This was the first indie pattern I've purchased and the also the first .pdf pattern I've assembled. One of the benefits of using a .pdf pattern was the ability to turn off other sizes and print only my desired size. I can't seem to make myself cut down tissue paper patterns to my size so this was fun to try. On the other hand I didn't love having to print out, piece together, and tape the .pdf pattern. It took a fair amount of extra time not to mention additional overhead. And I'm still working on how to best store my .pdf patterns once they have been assembled.


I cut out this cardigan in an extra small with the desire to assemble the whole garment with only my serger. Since the material was cut so small I wanted to be careful not to take off too much additional material with my serger blade. I probably should have taken the time to remove the blade since I wasn't entirely finishing each seam and ended up having to use a small zig zag stitch inside of my serged edges to completely finish each seam.


Although this version is fairly small I envision wearing it to the office in the summer, mostly over cute sleeveless blouses, so the size shouldn't be a big issue. I love this modern style and found the pattern quick and easy to assemble. When I do make it again I will size up to allow for additional layers.

Time estimated: 4 hours
Size: extra small
Material used: jersey knit, polyester spandex blend
Care instructions: machine wash warm or cold, tumble dry low, iron low in needed

Cost to make t-shirt:
pattern - $14.00
fabric - $9.00
*used existing thread
TOTAL: $23.00
QuickEdit
Marissa
0 Comments
[name=Marissa] [img=//4.bp.blogspot.com/-PZLYzJMG34Y/XiU1zvVCSSI/AAAAAAAARmg/Fom6rY8JYb4c5J4_WgJ0cOTlrVOsq1nFgCK4BGAYYCw/s355/NielsenFamily19Final-11%2B%25282%2529.jpg] [description=Hi, I'm Marissa, a hobby seamstress. Thanks for joining me on my journey as I create a handmade wardrobe. Like and follow via the social media links below to see my newest makes!] [(instagram=https://www.instagram.com/sew_help_me)] [(facebook=https://www.facebook.com/SewHelpMebyMarissa)] [(bloglovin=https://www.bloglovin.com/blogs/sew-help-me-19274771)]