Showing posts with label menswear. Show all posts
Golfing Polo

Golfing Polo


During my pregnancy, while my body is constantly changing, I've found it most rewarding to sew for my husband and eagerly anticipated baby. It's especially fun to sew for Paul because I can easily fit items on him throughout the process making the final garment one we're both really happy with.

This spring I made a Pacific Pullover for myself out of pique from Minerva and had a fair amount of fabric leftover. I liked the idea of Paul and I being able to wear coordinating outfits on the golf course, one of our favorite hobbies to do together, so I purchased the digital Jalie 3137 Polo Shirt for Boys and Men and got to work! I wanted to make the polo right away so I printed the pattern on printer paper at home and taped it together, my least favorite but admittedly the quickest way to get a pattern.


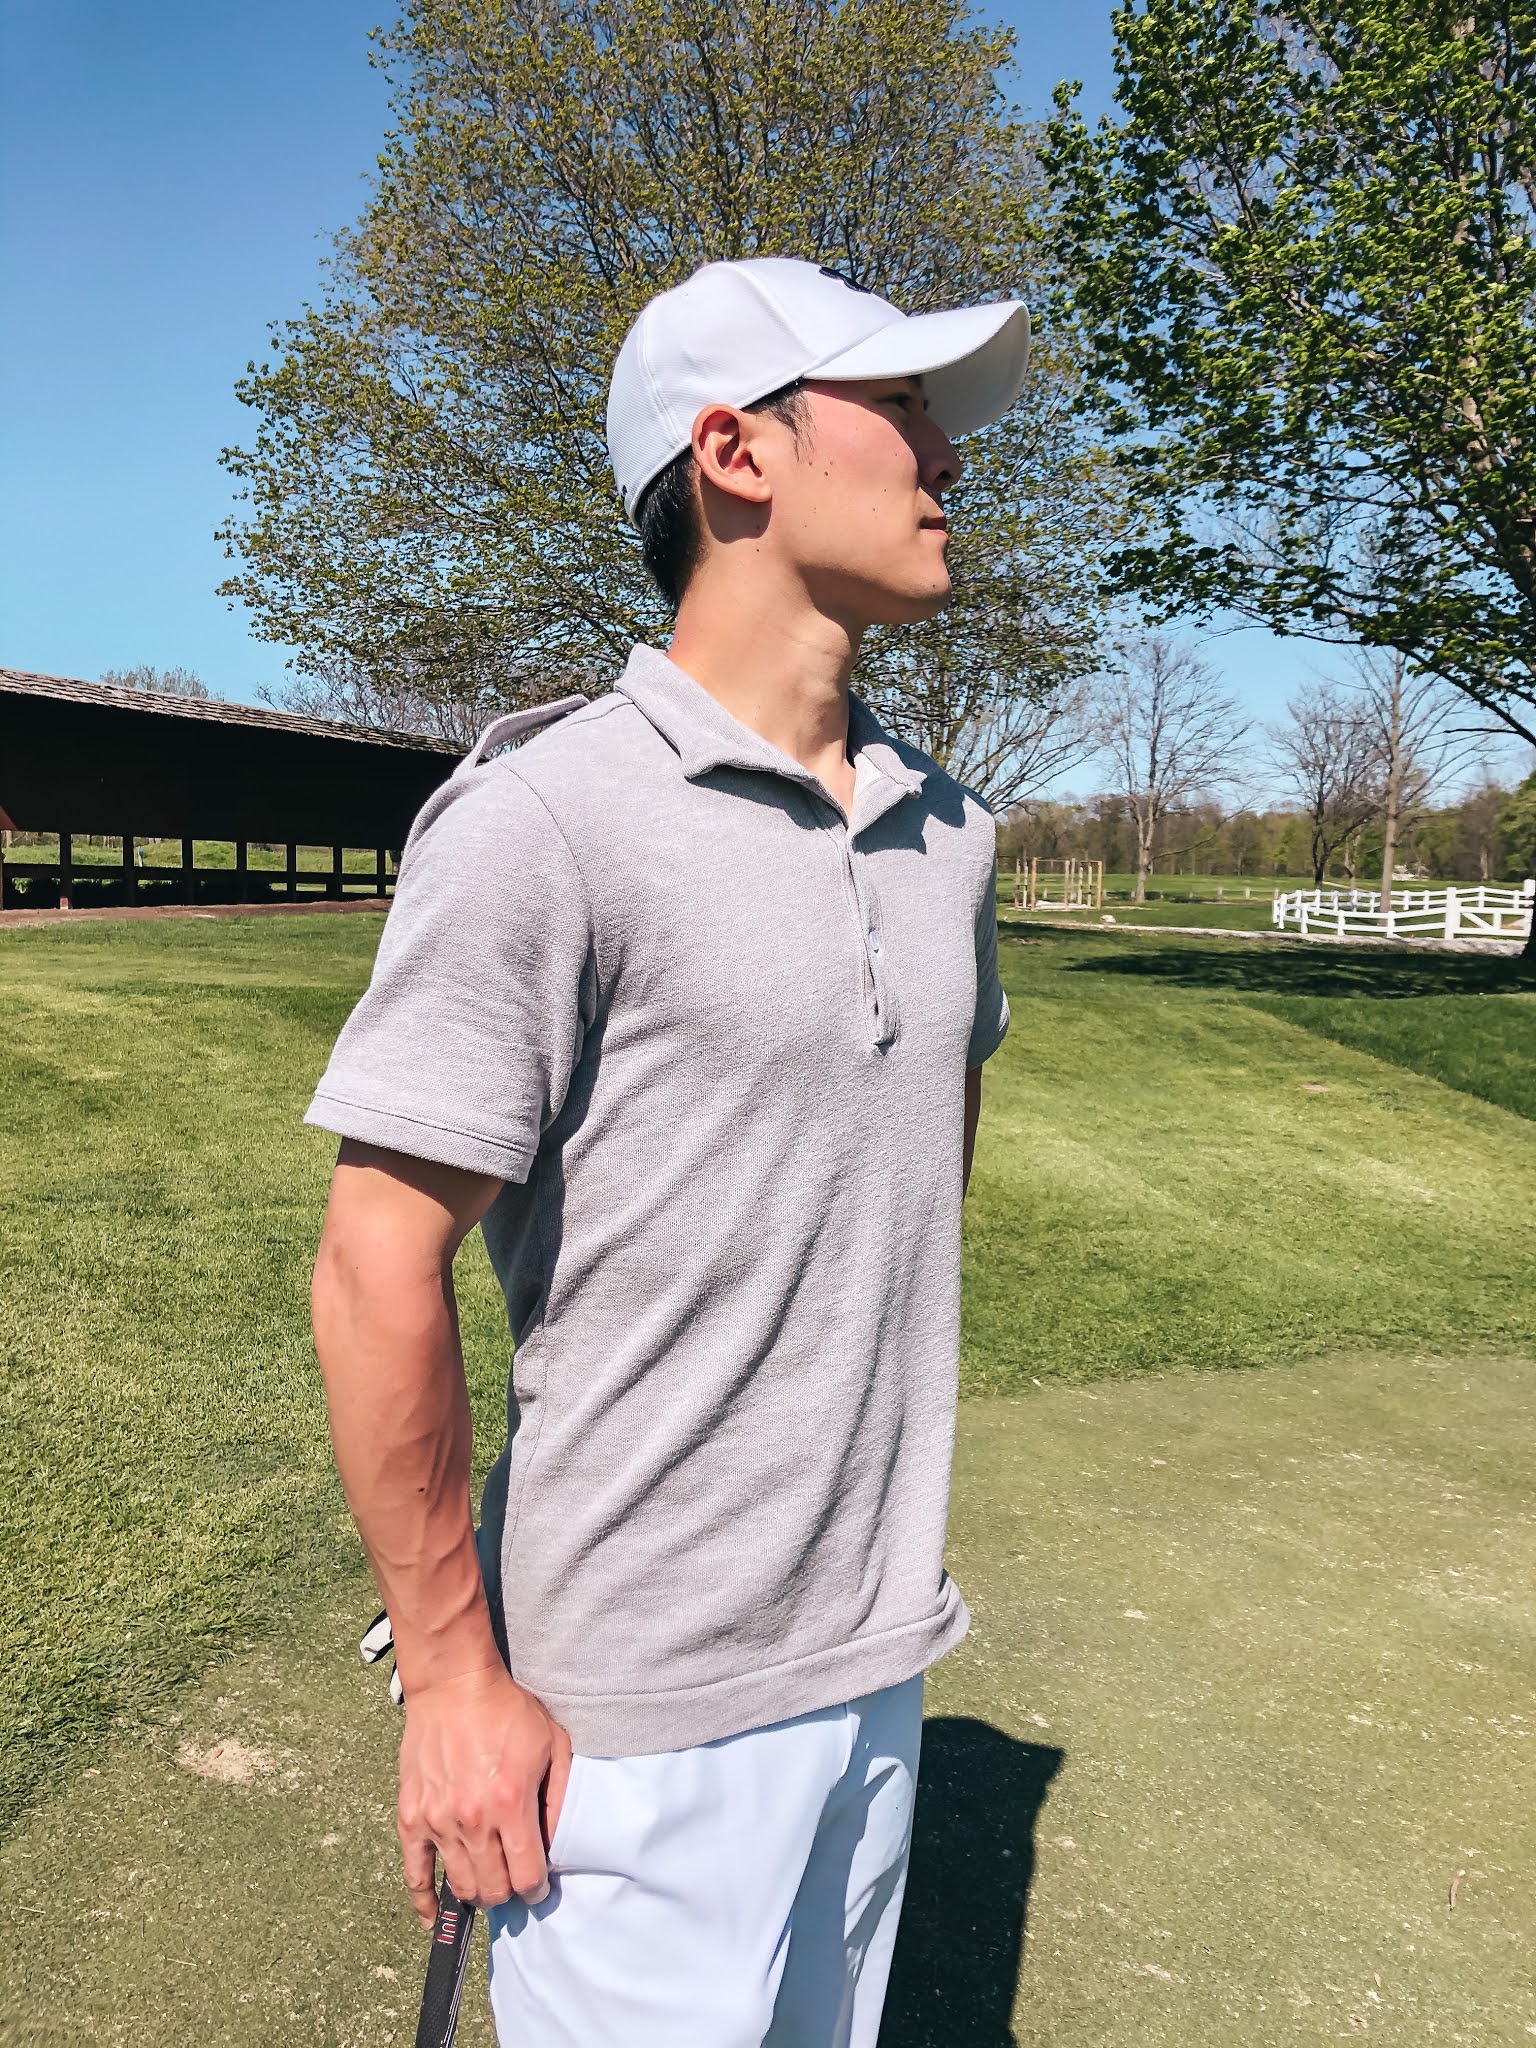
I took Paul's measurements and, given how stiff the printer paper was, cut a straight size "X" because it fit his largest measurements. Once cut out I pinned the main garment pieces together and fit the polo to Paul. It was a bit too big on him through the chest and waist so I removed 3/4" out of both side seams at the chest and waist, close to size "U", then graded back to size "X" at the hips. The shoulder seams fell a bit too far down his shoulders so I removed 1/4" at the top of the armscye, at size "W", and graded out to a size "X" before the bottom of the armscye. The last major adjustment Paul requested was to make the sleeves more fitted. I removed 1 1/8" at the top of the sleeve seam and graded to 1" at the bottom of the sleeve seam. Getting the look he wanted while leaving enough ease to play golf in the top was a balancing act since the pique has such little stretch.


This pattern offers a lot of sporty options including a yoke, chest pockets with or without flaps and shoulder tabs. Paul wanted a sleek look and decided to leave the pockets off. The instructions made inserting the button placket a piece of cake and thankfully my button holes turned out perfectly the first time! I only deviated from the sewing instructions to hand sew the collar stand down, which is a personal preference.

I really liked this pattern and would happily buy it again. The ingenious design allows you to use the same body piece for both the front and back, changing only the top portion between the front and back/yoke pieces. The pictures were very helpful, but all at the bottom of the instructions and I found the scrolling a bit irritating.

Paul loves the finished product and would be happy if I made a few more versions for him in a stretch athletic knit.


Pattern: Jalie 3137 Polo Shirt for Boys and Men
Size: X
Time estimate: 8-10 hours

Cost to Make:
pattern - $9.00
fabric, thread, and button - from stash
TOTAL: $9.00
Read more »
Marissa
0 Comments
Yorkshire Pullover

Yorkshire Pullover


I love how Paul's Yorkshire Pullover turned out. It is comfortable for him to wear, snuggly warm on the inside, and looks polished all at the same time. And this pattern comes with a cardigan option as well so I can certainly see myself making another version in the future. You can read all about this make on my profile at the new Minerva website and purchase your own fleece backed sweatshirt knit in a variety of colors here.

This fabric was gifted to me in return for a blog post and this post contains affiliate links. Paul loves his Yorkshire Pullover and I would definitely make it again! Thank you for your support.

Read more »
Marissa
0 Comments
Mens Slim Fit Button Up Shirt

Mens Slim Fit Button Up Shirt


Paul wears button up shirts at least six days a week, but has trouble finding a shirt that is slim enough for him. I was so glad when I saw Simplicity 8753, with a slim fit view and picked it up right away. As soon as I saw this gorgeous Italian cotton on super sale at my local fabric shop I just knew it would be a perfect match for the S8753 and I had to have it for Paul.

Thankfully, I had recently taken the Palmer Pletsch Tissue Fitting button up shirt course with Evelyn and was able to implement those techniques to make a perfectly fitted shirt for Paul. I started by taking his measurements and learned that Paul was a size 38 in the chest but a 34 in the waist. I cut out the tissue pieces in the larger size, pinned them together, and had Paul try it on. I ended up bumping the side seam out to a 36 to allow him more room to move and breathe. I also shortened the sleeves by an inch, then cut out the fabric. Although this plaid is a repeating pattern it is not a balanced plaid so I took extra care in cutting out each piece.

Paul got another fitting once I had the fabric pieces cut out and pinned together. At this point I made a few additional changes, letting out the side seam a bit at the hip and thinning the sleeves by one inch. Then I was ready to sew!


I had the opportunity to try two new-to-me sewing techniques with this pattern, sewing sleeve plackets and flat felled seams. I can't say enough good things about the instructions in this pattern, which led me to gorgeous results and I was thrilled to add a few new sewing skills to my repertoire. One additional thing I really appreciated about this pattern was the additional pattern piece to help aid with button placement - no more wonky button placement! I know this will become a tried-and-true pattern in my collection. If you've been thinking about purchasing this pattern, or own it but haven't made it yet, I can't encourage you enough to give it a try!

The fitting and pattern matching took as much or more time than actually sewing the shirt. I have been practicing slower and more intentional makes and found this one extremely rewarding. Thankfully Paul loves it too!


Time estimate: 20 hours
Size: 38
Fabric used: 1 7/8 yards, Italian cotton
Care instructions: machine wash, tumble dry low

Cost to make
Pattern: $15
Fabric: $16
*used thread from my stash and buttons from my mother's stash
TOTAL: $31

P.S. Check out my Insta stories, @Sew_Help_Me, to see the fitting process step-by-step!

Photos by K.Willerick Photography
Read more »
Marissa
0 Comments
Sew Family Jammies

Sew Family Jammies


When I was a little girl I spent every Christmas Eve at a candlelight service with my family, then we would come home and open a few presents from my Auntie and Uncle David. I remember one special year very fondly; Auntie had gotten my sister and I each a new set of pajamas with a matching nightgown for our Barbies. Barbie and I went to bed and woke up to find Santa had come with new toys for each of us.

I was excited to learn about #SewFamilyJammies and join in making a set of matching Christmas pajamas for my husband and I. I think this is the first time my pajamas have matched someone else's since that Christmas Barbie and I shared a matching set!

I chose a classic red and black buffalo plaid snuggle flannel for our pajama pants and a black rayon spandex blend for our shirts which I purchased at JoAnn on Black Friday for 70% and 50% off! With such little time between Thanksgiving and Christmas this year I was only able to finish the pajama pants before Christmas, but I do plan to make our shirts soon. I used the same pattern to make a tank top for myself earlier this summer and know I like the fit.


Since I was sewing a plaid I wanted to try to "out smart" the pattern, which had a separate front and back piece, by combining the two pieces at what would be the side seam. In my mind, this would eliminate pattern matching and some work by removing a few seams. However, the pattern was slightly rounded at the hips, so I needed to cut each piece separately. This pattern didn't come with pockets, but since the pattern does have a side seam it would be easy to add them.


I used the sewing pattern markers to make sure the plaid was aligned on the front and back pieces, then I laid one set of front and back pieces on top of the fabric, matching plaids, to cut the next set of front and back pieces. The snuggle flannel is only 42" wide and as it turns out I didn't get enough fabric for two sets of pajamas. I cut a size medium for Paul and a small for myself, after going on an extra fabric run!


I stuck to the pattern instructions, only deviating to hem the pajamas to our height and "stitch in the ditch" to tack the elastic at the side seams. I just HATE when elastic waistbands roll and wanted to prevent that. We love how they turned out.


Merry Christmas from our family to yours!

Time estimate: 4 hours total
Fabric used: 100% cotton
Care instructions: machine wash gentle; no chlorine, bleach or fabric softener; tumble dry low; cool iron

Cost to Make
Pattern: gifted from my mother
Fabric: $16
*thread and elastic from my stash
TOTAL: $16


To follow the rest of the #SewFamilyJammies blog tour, visit these blogs too!
December 2  Teri // Fa Sew La
December 4  Sierra // Seams Like Sierra
December 6  Emily // Replicate then Deviate
December 10  Heidi // Handmade Frenzy                
December 11  Sharon // Sweet Mama Life
December 12  Carrie // Beri Bee Designs
December 13  Katie // KatieKortman.com
December 16  Melissa // A HAPPY STITCH
December 17  Taish // Blooming Skies
December 18  Leanne // Thready For It
December 20  Brooke // Idle Sunshine
December 21  Marissa // Sew Help Me
December 23  Lara // Handmade by Lara Liz
December 24  Kelly // Petite Stitchery
December 25  Jess // Broad In The Seams
December 26  Victoria // Victoria Beppler
December 27  Heather // Heather Handmade
December 28  Sylvia // The Ravel Out
December 30  Victoria // Victoria Lucille Anne
December 31  Teronia //  Sew Haute Blog
Read more »
Marissa
2 Comments
Valentine's Vest

Valentine's Vest


There is one item in my husband's wardrobe he absolutely could not live without. I mean, he wears this vest at least once a week, sometimes more. He got it on a trip to Korea almost eight years ago and I'm afraid something will happen to it and we won't be able to replace it.


I searched high and low for a vest with a solid, fitted fabric back for his Christmas gift with no luck. I even looked for a pattern to make one for him and came up empty handed. Eventually I decided to use his existing vest as a pattern for a duplicate and embarked on the slow and tedious process of tracing each piece.


Since this was my first attempt at making a duplicate vest I simplified the pattern as much as possible and asked my husband to try it on at nearly every stage. After assembling the exterior pattern pieces and lining the vest it was time to add the buttonholes. I was nervous about making any cuts in the beautiful piece I had nearly completed so I practiced making many buttonholes on a scrap of the same fabric.


I was fairly happy with how the buttonholes turned out and even happier with the completed project. It was a big time investment, but low cost since the outer material was free to me. I used thread I already owned and only purchased lining material and buttons.


Isn't he so cute in this Valentine's Day outfit?! He wishes the vest offered him a bit more wiggle room and I would welcome any advice you might have on pattern tracing, recreating existing RTW pieces, sizing up patterns, and any vest patterns you have tried and liked. Happy Valentine's Day!


Read more »
Marissa
0 Comments
[name=Marissa] [img=https://blogger.googleusercontent.com/img/b/R29vZ2xl/AVvXsEgft-3vDDqLpq4lxEo2Wx4YkE4-TQNU7SAldhEeqsnJ5NGKN48OSU2c-E6TmDZGf5IPiR6oTsNR332bRJ3dZZcIO7bkMkNpuXcp1K9AtFQ5rlu0kfvBzzjk-gyIKt6lGyYAM1HQ5b-z1Xg/s355/NielsenFamily19Final-11+%25282%2529.jpg] [description=Hi, I'm Marissa, a hobby seamstress. Thanks for joining me on my journey as I create a handmade wardrobe. Like and follow via the social media links below to see my newest makes!] [(instagram=https://www.instagram.com/sew_help_me)] [(facebook=https://www.facebook.com/SewHelpMebyMarissa)] [(bloglovin=https://www.bloglovin.com/blogs/sew-help-me-19274771)]